
 Even in Summertime, soggy mornings make me think of massive mugs of heavenly hot chocolate, teeming with a mountain of mini marshmallows on a cloud of whipped cream, dusted with chocolate shavings. It’s guaranteed to put a smile on even the sourest of faces, especially if there’s a chunky chocolate chip cookie to dunk in it. I must admit, I like my hot chocolate made the old-fashioned way – boiled milk, slowly poured over flakes of grated chocolate & whisked up until silky smooth with a delicate foamy froth. After one of these & a cookie, I can take on the world (albeit slowly!).
 Over the weekend, I was invited to a beautiful ladies’ afternoon tea at one of my lovely friend’s homes & took some of these naughty chocolate chip delights as a little gift for her (fresh flowers are nice, but you can’t really eat them!). These are based on a blondie recipe & are really rich & indulgent, because they are full to the brim with so much chocolate, then swirled & drizzled with more chocolate (just to make sure there’s enough in them!). The chocolate chip & peanut butter version was a kind of happy mishap – I was experimenting with the recipe & added a splodge of smooth peanut butter into each scoop, encasing that nutty, buttery centre in the cookie dough.
  As they bake in the oven, the peanut butter starts to melt & infuse the cookies (& kitchen) with that nutty flavour & sweet scent. Of course, they are drizzled with melted chocolate too & a few chopped, salted peanuts sprinkled generously on top – the slight saltiness complements the chocolate so well! These are not for the faint-hearted, nor are they for everyday munching really – they should be a treat, or for those days when you’re just feeling a bit pants & want a “pick me up”. If I’m feeling particularly decadent, I’ll make some with plain chocolate chunks & shards of stem ginger (my favourite), or chopped dried apricots with white chocolate pieces. The choices are as endless as your imagination! The best bit? They are really easy & take minutes to make. Hands washed, aprons on & here we go!
What you need:
100g vanilla or caster sugar (I make my own vanilla sugar, so it’s naturally flavoured)
125g light Muscovado sugar
150g melted butter
1 large egg
1 egg yolk
300g plain flour
2 teaspoons vanilla extract (the proper stuff, not “essence”)
Half a teaspoon of bicarbonate of soda
200g milk chocolate & 100g plain chocolate, chopped into chunks (I chuck mine in the fridge for an hour, then whizz them up in the food processor)
200g milk chocolate (for melting)
What to do:
Pre-heat the oven to 170*C. Prepare a couple of baking sheets by lining them with greaseproof paper (no washing up tins later!).
Gently melt the butter & set aside to cool slightly.
In one bowl, sift the flour & bicarb.
In another bowl, mix the Muscovado & the vanilla sugars. Muscovado is a bit moist, almost like damp sand in texture, so break up any lumps with a whisk or fork.
Pour the melted butter, egg & egg yolk into the sugars, along with the vanilla extract. Whisk together until just combined & you get a creamy, caramel coloured liquid.
Slowly add the sifted flour & bicarb to the caramel liquid, stirring well until it is all incorporated & turns into a lovely firm cookie dough.
Add the chocolate chips to the cookie dough, distributing evenly.
 Get yourself a medium sized metal ice-cream scoop (one with a spring loaded handle is best), then scoop dollops of cookie dough up & drop them onto the greaseproof lined baking tray. Leave a good couple of inches between them all – they will grow! If you want to save some for another day, you can always freeze a few scoops at this stage & just defrost them when you fancy a treat.
 Bake in the centre of the oven for between 16-18 minutes, then gently transfer the cookies onto a cooling rack. If you put the tin next to the cooling rack, you can actually pull the greaseproof paper onto the rack & then move the cookies directly onto the rack after. They will be soft until they cool, so be careful as they are more delicate than they look.
Once cooled, put another sheet (or the same one) of greaseproof paper underneath the cooling rack. Then melt the chocolate & drizzle over the cookies, making whatever pretty patterns you like & even adding more chocolate chips or chopped nuts on top. That’s it! 
You might want to leave them to set before indulging, or you’ll get into a chocolately gooey mess! Diamonds may be nice but chocolate is everyone’s best friend (especially when you share). Stay hungry! 😉 A x

 The first pasta I ever made was a very soupy looking lasagne when I was a teenager & it didn’t improve much until my twenties – it tasted very nice, but you needed a spoon to eat it. My pasta skills have progressed a bit since then & I am happy to say, you don’t need a spoon to eat my lasagne anymore (although I do recommend wearing an elasticated waistband).
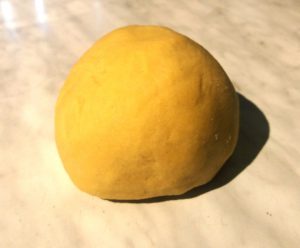 The recipe I use is 100g of strong ’00’ flour (or strong bread flour) & one large egg, per person (so if you’re cooking for three people, that’s three eggs & 300g of flour). However, I like to mix half flour with half fine semolina, which gives it that gorgeous golden, sunshine yellow colour (& everyone likes a little sunshine).
 work surface. Make a well in the middle, crack your eggs in carefully & combine them a little before using clean, cool fingertips to bring the flour in from the sides & gently combine into a lovely golden dough (it’s messy, but that’s half the fun).
 Knead for about five minutes until flexible, then wrap in cling film & leave to rest in the fridge for half an hour. After that, you can roll it out, stuff it with some fabulous fillings, or cut into ribbons (such as tagliatelle) & even hang some up to dry for another day (if you don’t have a rack, use a clean clothes horse). It’s that simple! If you do save some, remember to store in the fridge because it’s got fresh egg in it.
 To make ravioli, roll the dough out until it’s almost thin enough to see through. Lay it down on a flour dusted surface (sprinkle some semolina too – this will stop it sticking). Then simply add small splodges of your filling (about a teaspoonful), roughly an inch apart, down one side of the pasta sheet – sometimes I use a piping bag to do this (less mess & a bit quicker). Dip your finger in a cup of cold water, run it along the edge & between the fillings, before folding the other side of the pasta over the top. Press the edges down firmly, using a cupping action with
  the side of your hand to separate the fillings into individual bumps & remove any air. Cut them into little parcels using a ravioli or pizza cutter (or even a small cookie cutter) & set aside on a plate or board, again dusted with flour or semolina (or both).
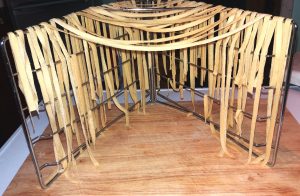 cook in about 2-3 minutes, so pick one out & have a taste to check – obviously, if you’re cooking ravioli or similar stuffed pasta, use your judgement on this & make sure the filling is piping hot. Then drain (saving a cup of the water) & serve as you like it- spoon on some sauce, or just add a drizzle of extra virgin olive oil & a sprinkle of black pepper. If your sauce is a bit too thick, add some of the cooking water to loosen it up a bit & make it silky smooth (you really don’t need much). All you need to do then is eat it!
 Speaking of sauce, usually I make my family recipe tomato sauce for this, but sometimes there’s a bag of salad that needs using up – perfect for homemade pesto. Try blitzing a couple of generous handfuls of fresh washed rocket, basil & spinach in a blender (I’ve used all sorts of leafy greens & lovely veggies from the fridge for this over the years). Add a good drizzle of olive oil, a few pine nuts (almonds or walnuts are good substitutes) & about an ounce of grated hard Italian cheese – I use either Parmesan or Grana Padana (sometimes a mixture of both), but it’s down to your personal taste here. You don’t need any salt – Parmesan will add that flavour. Add a little of the pasta water to thin it out a bit & spoon over your handmade ravioli!