 The Christmas countdown has commenced & everything has gathered momentum. Shops are bulging with baubles & tinsel, snow dredged streets have transformed into Las Vegas-style light displays & peace has been replaced by panic, as everyone realises they have two weeks to get organised, including the food! As you’ll probably be racing around like a crazy Christmas shopping ninja, jacked up on Java & sugary snacks, desserts for Christmas Day are probably the furthest from your mind, which is why my third Christmas blog is full of sweetness.
Every Christmas it’s always the same – boring boxes of mince pies (or the homemade ones that Queen Thistle* would be proud of), Christmas pudding (flambéed eyebrows anyone?) & fruitcake so boozy, your breath can melt glass! We’ve all been there & said our polite thank-yous, while discreetly disposing of half-eaten mouthfuls in a napkin. [*Queen Thistle is in Ben & Holly’s Little Kingdom – ask any five year old who made the bricks for Mrs Fig’s school!].

Because I don’t do anything remotely traditional about Christmas desserts, we like to create a few traditions of our own. Before Christmas arrives, I discuss desserts with my Husband & Son, then we all pick a different one & make them. It’s that simple & everyone gets what they wanted, because they picked it. Usually, the guys like a tiramisu or my refreshing lemon cheesecake, scattered with a selection of fresh berries. If I can get some good lemons, I’ll make a luscious lemon drizzle cake too – splashed with Limoncello, this makes an excellent trifle base (without custard obviously, because that’s just wrong!).
When I was a little girl, my Mum & Grandma would bake all kinds of delicious creations, including beautifully light, crisp choux pastry (pâte à choux). Mum vigorously beat the paste with such effortless ease,  until it was silky smooth (although simple to make, profiteroles need strong arms & plenty of stamina). Once baked & filled, these piled up plump little pastries would be generously glazed with glossy, rich chocolate sauce & adorned with sparkly spun sugar. I would watch in amazement as my Mum swiftly whipped a sugar-dipped fork through the air & glittery, golden sugar strands would appear as if by magic! Although I don’t tend to make spun sugar very often, I do still make proper profiteroles & once you have tried them, you’ll be hooked too. So, hands washed & aprons at the ready!
What you need:
4oz Plain Flour
2oz Salted Butter (plus extra for greasing trays)
A quarter of a pint of cold Water
3 large Eggs
600ml fresh Double Cream (for filling)
What to do:
Place the butter in a medium sized saucepan & add the water. Gently heat until the butter is completely melted, then bring to the boil.
Remove the pan from the heat & add the flour, stirring well.
Put the pan back on the heat, stirring continuously until the mixture comes together into a ball in the pan, then leave to cool.
Beat the eggs in a separate bowl.
Once the mixture has cooled, this is where you need your muscles! Grab a wooden spoon & gradually add the eggs a bit at a time, while beating them vigorously into the mixture, until everything is combined. Then you’re ready to pipe!
Pre-heat the oven to 220*C & prepare a couple of baking trays – grease with butter, then run them under cold water & tip off the excess (you need a film of moisture to create steam in the oven to help raise them).
Tip your choux paste into a piping bag with round nozzle attachment (usually about 1cm sized), although I like to use a star nozzle because it gives extra texture. If you stand your piping bag over a tall mug or jug, folding the edges over the top to hold it in place, you can do this with ease & avoid losing your choux paste. Once filled, get rid of any excess air from the bag & twist the top to close it (after all that hard work, you don’t want your bag bursting!).
Pipe the mixture into round little dollops about an inch big, leaving an inch or two gap between each of them so they can grow.
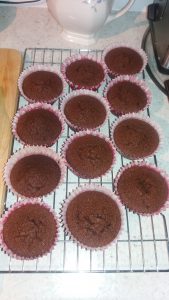
Bake for 20 minutes until risen & slightly golden. Tip onto a wire rack & while they’re still warm, make a little hole in the side of each (gently poke the end of a knife in). Leave to cool.
 Once cooled, your profiteroles are ready! If you are preparing them in advance, you can freeze them a few at a time in a single layer – they crisp up beautifully after a few minutes in a warm oven & you’ll be able to dish up a dessert at a moment’s notice.
Fill your piping bag with whipped cream & pipe into the tiny hole you made in each profiterole, until just full. Stack them up on your plate or put them in the fridge in a covered dish, but don’t leave them too long as they will go soggy.
 Generously drizzle warm, chocolate sauce over them & serve! You want the recipe for chocolate sauce, don’t you? It’s really easy to make & one of my favourite “chuck it all in a pan” recipes. I make jars of this & store it in the fridge or the cold pantry, then warm it up to make it runny enough to pour over cupcakes (it tastes fabulous spread on hot toast too). Here it is!
What you need:
4oz Butter, cut into small chunks
8oz Plain Chocolate, chopped into chunks (use the food processor)
14oz tin of sweetened Condensed Milk
What to do:
Pour the milk into a dry small saucepan, add the butter & chocolate chunks.
Heat gently on low, slowly stirring with a whisk & making sure everything is combined, for about four or five minutes. It should be glossy, smooth & silky.
That’s it! Your sauce is ready, so pour it into a nice serving jug or sauce boat just before the dessert is plated up. This also makes a fabulous fondue with chunks of pineapple, whole strawberries or fluffy marshmallows dipped in (elasticated waistbands are advisable though).
Ready for more? Thought so! As most Christmas food is heavy & starchy (especially fruit-laden puddings), we tend to go for light, fresh or fluffy desserts instead & this one is all three: Strawberry Sponge Square Cake. It was the result of an impromptu dinner party, where I had to quickly improvise with what was in the fridge at the time & it has become a firm favourite! The sponge cake can be made the day before & kept in an airtight container with greaseproof paper between the slices, then all you need to do is assemble it!
What you need:
2 large Eggs
3oz Self-Raising Flour
3oz Vanilla Caster Sugar (or give normal sugar a whizz in a coffee grinder like I do)
A little melted Butter for preparing your tin
1 heaped tablespoon extra Vanilla Sugar (for laying your sponge on)
What to do:
Pre-heat the oven to 220*C. Get a shallow baking tray or Swiss Roll tin & brush the melted butter all over the inside.
Line the tray with a sheet of greaseproof paper that is slightly bigger than the tin, leaving half an inch of paper out of the tin all the way around – you will need this to lift your sponge out at the end. Push the paper into the corners & making sure it is completely covered with the butter.
Take the greaseproof paper out, turn it over & repeat, leaving it in the tin, with the edge sticking up all the way around.
Crack the eggs carefully into a mixing bowl & give them a whisk to break them up.
Add the sugar & give it a good firm whisking until pale & cream coloured. I usually use the electric whisk for this (even I have my limits!) & whisk for three minutes on full.
Next, you need to fold in the flour. Folding is easy, just take your time. Sift the flour into the bowl, then using a large metal spoon, make a figure of eight & tip the flour over into the liquid. Repeat until all the flour has been incorporated into a lovely, thick foamy mixture.
Using a spatula, scrape the mixture into your prepared tin. Make sure you get it into all the corners & level it out with the spatula if necessary.
Bake in the centre of the oven for about 4 minutes, until it is golden & slightly risen. Give it a gentle pat with a finger & it should spring back – that’s when it’s ready.
Sprinkle the other sugar onto another sheet of greaseproof laid on top of a wire cooling rack.
Remove your sponge from the oven & carefully tip the whole thing over onto the sugared greaseproof paper, using the edge of the cake paper to help you if need be.
Pull off the greaseproof paper from the sponge cake & discard. It should come away easily (& the smell of baked butter is just heavenly!). Leave to cool for a few minutes.
Once cooled, take a large knife with a smooth blade (like a French cook’s knife) & trim the edges of your sponge (you can eat these or feed them to the birds).
Cut the sponge into three equal strips & set aside while you make the filling. The filling can be prepared the day before too, just keep it covered in the fridge.
For the filling:
600ml fresh Double Cream (the real stuff please, it’s Christmas)
1oz Icing Sugar, plus extra for dusting
1 large punnet of Strawberries
What to do:
Wash, trim & hull your strawberries – that’s the tough bit under the leaves in the top of the strawberry. Just run a little paring knife under  the leaves, all the way around & it should come out. The more ripe the strawberries, the easier it is.
Stand them pointy end up & using the paring knife, slice thinly – keep the trimmed edges to one side for decorating (or munching). Put to one side in a bowl or large cup.
Get the electric whisk out again & whisk the double cream in a large mixing bowl, adding the icing sugar as you do so, until it is in soft peaks – the icing sugar gives the cream body & will hold it’s shape when piped. You can whisk it by hand if you need to release some stress, but it’s really important that you don’t over-whip the cream, otherwise you’ll end up with butter (yes, really – I’ll cover that in another blog when we’ve all got more time).
Now you’re ready to assemble your sponge cake! Take your first layer of sponge & lay it on a serving plate.
Scoop the cream into a piping bag with a star nozzle (or a smooth round one). Pipe a layer of cream in a decorative swirly pattern around the edge. Take your time over this, there’s no rush.
Lay strawberry slices all over the cream, leaving the pointy tips over the edge slightly.
Take the next layer of sponge & squeeze a little splodge of cream on the underneath side, then lay it gently on top of the strawberries.
Repeat with the next layer in exactly the same way, leaving a layer of sponge cake on the top.
 When you’ve finished, you should have a beautiful strawberry sponge square cake (yes, I’m aware it’s not square, just go with it). Dust lightly with icing sugar all over the top (use a tea strainer for this & you only need about a teaspoonful of icing sugar to do the whole thing) & serve immediately.
Use any remaining strawberries & cream to decorate each person’s plate, maybe dusting with a bit more icing sugar if you like. Or you  could just hide the rest in the fridge for nibbling on later (I think you’ve earned it!). If you don’t like strawberries, use blueberries or even your favourite jam. One of my favourite variations is to make a tiramisu filling instead of using cream, then mix some Sherry or Brandy with an equal amount of espresso coffee to drizzle over the sponge & replace the icing sugar on top with finely grated dark chocolate. Decorate with a few coffee beans & a sprig of fresh mint.
So that’s dessert done & dusted (with icing sugar)! Hopefully, I’ve given you some ideas for lighter & brighter alternatives to the usual stodgy puds, something to bring a little freshness to your Christmas table. Now you know the drill – get yourself a lovely cuppa, put your feet up for a bit & relax, we’ve got this covered. Stay hungry! Aimee 😉 x


 Autumn is definitely making her presence felt, with sultry November sunrises becoming crisp, chilly mornings splashed with sunshine. The trees have turned tinted leaves into a stunning array of amber hues & luscious colours. This collection of colourful foliage always draws my admiration, as they seem to suddenly appear in full beautiful bloom & disappear just as quickly. Recently, whilst parked under a particularly pretty tree at a local supermarket, I managed to snap some shots of it’s vibrantly golden leaves shimmering in the sunshine.
 Nature is my biggest inspiration (as you probably can tell from my sugar artwork) & this time of year is no exception. It’s a deliciously indulgent season, perfect for hot chocolate & comfort foods to sustain us until Spring. And what better way to celebrate the changing of the seasons than with a sumptuous chocolate cake, layered with rich dark cherries & fluffy cream! Ready to bake it happen? Hands washed, aprons on & here we go!
  Sieve all the dry ingredients into a bowl & mix well with a fork. Put to one side.
 Sift half of the dry ingredients into the creamed mixture & using a spatula, fold in until all completely blended. Add the rest of the dry ingredients & repeat until the mixture is a thick, smooth batter & there is no flour visible.
 Split the batter between the two tins evenly, smoothing the tops lightly with the spatula. Place in the oven (lower rack) for approximately 30 minutes, until the tops are risen & cracked. Poke a stick of spaghetti in the centre & if it comes out clean, your cakes are done.
 Run a spatula knife around the edge of each cake to separate it from the tin. Carefully remove the cakes & place on the racks to cool. Be very gentle, as your cakes will be fragile & soft. Leave to cool completely before removing the greaseproof disc gently from underneath.
 Carefully drape your strips of leaves over a rolling pin & leave until completely set. They will become curved & softly shaped, perfect for topping your cake.
 Take the other chocolate cake & flip it over, so the flat side is on the top, then place it on top of the filling. This will leave you with a nice flat surface for decorating! If you’re serving this later, pop your cake in the fridge in an air-tight container (to stop it drying out).
 Time to indulge, so grab some plates & serve! The fluffy, almost fudge-like texture of the cake is complimented by the cloud of mascarpone cream & crisp, chocolate leaves that crackle as you bite them. This cake also looks fabulous with frilly white chocolate leaves mixed in with the dark, dusted with grated white chocolate too. If you have any extra chocolate leaves, save them for nibbling with your morning coffee or add them to the frothy tops of hot chocolate, amid swirls of cream & marshmallows.
 bake all kinds of wonderful delicious treats, including the most beautifully light, crisp choux pastry (pâte à choux). I remember sitting in the kitchen, watching in amazement as my Mum vigorously beat the dough with such ease, making it seem so effortless. Of course, I learned later on there is a lot of effort that goes into them – although simple to make, profiteroles need plenty of stamina!
 by magic! Although I don’t tend to make spun sugar very often, I do still make proper profiteroles & once you have tried them, you’ll be hooked too. Ready to bake it happen? Hands washed & aprons on!
 They even freeze well (unfilled), so you can have a stash ready for unexpected guests or just as a treat when you fancy them.
 Sultry September has arrived with a slight coolness about her & although the mornings are a little chilly now, the sunrises are just as spectacular. Getting up early means I see some amazing sunrises & Autumn never fails to deliver. An array of moody clouds smooched across the sky this morning, kissing the rooftops as it gave way to the sunshine before we’d finished breakfast. The garden looks prettily overgrown at the moment, all luscious long grass, wispy branches
  & a scattering of jewel-coloured blackberries on the hedgerows, contrasting with their dark green background. They are happily growing at a rapid rate, replacing the ones that have already been plucked & packed in a pie with sweet sliced apples & cinnamon sugar.
 a good fruit pie! Although a slightly stodgy pie is very welcome at this time of year, sometimes we like something a little lighter but just as indulgent. On one of my recent shopping trips to our local shops, there were shelves stacked with punnets of pears. They looked so beautiful & fresh, with pale juniper green skins & a smattering of gold around the bottom. Obviously, I had to buy some & starting thinking of how to do them some justice in a lighter pie, recipe calculating in my head as usual. By the time I got to the checkout a few minutes later, I’d packed my basket with a selection of ingredients & headed home excitedly to start my next creation.
 The filling would have included single cream, however there was a slight incident. Upon opening the fridge, the cream pot leapt from the top shelf, unceremoniously smacking into the floor & spectacularly showering me & everything in it’s path. Cue a huge clean up operation & a slight delay in my creation. When things like this happen, I tend to have a look around to see what I can replace it with, rather than hit the shops again & I had some lovely over-ripe bananas that were the perfect replacement! My Pear & Almond Tart (Crostata di Pere e Mandorle) is a simple but pretty dessert, easy to make & the addition of the dark chocolate makes it deliciously decadent. Ready to bake it happen? Hands washed, aprons on & here we go!
 4 ripe Pears, peeled & cored
 Roll out your pastry to a couple of inches larger than the pie tin. Using your rolling pin, flop the pastry over onto it & carefully drape it over your pie tin, so it reaches all the inside edges.
 Remove your tin from the oven & put on a cooling rack. Leave the greaseproof paper & baking beans in place for at least 5 minutes (they will be hotter than the sun), then lift them out on the greaseproof paper & put in a heatproof bowl or similar to cool.
 Now to make the filling! Take the pears & halve them. Use a teaspoon to scoop out the core. Slice each half into fine, frond-like fingers. Place one half in the pastry case, rounded side up & gently press to fan them out. Add the next pear half & repeat, making sure each is nicely spaced apart.
 Scatter the chocolate pieces all over the pears evenly.
 Stir the ground almonds & flour together in a separate bowl, then fold into the wet ingredients until blended thoroughly.
 Remove & put on a cooling rack to rest. Once cool, trim off the pastry edge until level with the pie tin. Set aside while you make the decorations.
 Lift the paper up & place on a cooling rack until completely cool.

 Sweltering Summer is here & the garden is flourishing fabulously, although the heatwave has played havoc with plans for doing any gardening! The bees have been busy collecting their nectar & blossoms are blooming in abundance, inspiring me to create some Summery sugar art.
 or sassy, shoes are a wonderful way to bring a smile & shouldn’t just be for your feet! Since I began making my fancy footwear, I have tried all kinds of techniques, tools & templates, but always end up using a pair of my favourite shoes as a general guide. If I’m honest, I prefer to make each one “freehand” so I’m creating something unique & special each time.
 buttercream frosting & although they have evolved considerably since then, I still like to make my little cupcake shoes for special occasions. These sumptuously sweet stilettos are really easy to make & baking beginner friendly – the hardest part is deciding how to decorate them. Because I wanted this to be for everyone’s level of ability, I would suggest using ready-made biscuits for the sole & heel in this recipe. Ready to bake it happen? Hands washed, aprons on & here we go!
 A few drops of your favourite food colour (try using the gel colours, as the ones from the supermarket tend to make your mixture go watery & the colours weak – I used PME Cake Decorating natural food colours for this recipe).
 Remove your cupcakes from the tray & pop them onto a cooling rack. Leave until fully cooled.
 Once you’re happy with your buttercream, pop in a piping bag with your preferred nozzle & get swirling! For a large swirl covering the whole cake, start at the outer edge & pipe slowly around your cupcake, heading towards the centre & finish with a swirl in the middle. If you’re not sure how, my tip is to practise on a piece of greaseproof paper a few times beforehand. You can always scoop the buttercream back into the piping bag when you’re ready (no point in wasting all that hard work you’ve put in!).
 Put the cupcakes on the serving plate or board that you will be using to present them (once they’re made, you want to be able to move them easily). Leave a couple of inches space between them.
 Next time you’re having a few friends over for a special occasion, why not kick it off with some handmade sweet shoe treats & make my Cupcake Chocolat-toes! Stay hungry! A 😉 x
 Sitting at my desk writing my blog this morning, drinking a cup of tea as the warm sun is sparkling through last night’s rain on the window, it occurs to me that we’re hurtling into Summer rather rapidly. The changeable weather is free-wheeling, which is giving us all wardrobe issues (cue carrying various rainproof supplies – brolly, raincoat, shoes instead of sandals, to name a few!). We layer up in the damp, chilly morning, only to find that by lunchtime it’s blazing brilliant sunshine! One thing that is benefiting from all this random weather is the garden. Our pots of plants are flourishing & fabulous flowers are blooming between splashes of rain & sporadic sunshine, giving us some glorious fruit & vegetables to look forward to, hopefully very soon!
 Husband calls me the Bee Whisperer, because I’m always rescuing them. The bees are very important to us & we should look after them – after all, no bees means no fruit & veggies (or wine, beer & chocolate!). If you see one resting on the ground, he’s probably just tired & needs a rest. Gently move him to safety (use a piece of paper to slide underneath) & give him an energy boost – dissolve a little sugar in some tepid water & put it in a little bottle cap next to him. Trust me, once they’re rested & recuperated, they will buzz back with all their little friends (aka the Pollinators!).


 Pour the condensed milk into a saucepan with the butter & chocolate. Heat gently to melt, stirring carefully until everything is fully combined & melted into a dark, delicious pan of gooey gorgeousness (resist the urge to taste it – it will be quite warm!). Turn off the heat & leave to one side to cool for a couple of minutes.
 Remove the biscuit base from the fridge & pour the chocolate sauce on top & return to the fridge to set for an hour.
 the kettle
  Hungry for more? Thought so! These sweet shots of fast fruity cheesecake can be prepared in moments. As these are individual portions, I prefer to serve them in some pretty wine glasses, such as Champagne saucers, Martini glasses or just large wine glasses (you can use tea-cups for children’s portions – the handles make it easier for them too). Aprons on, hands washed & here we go!
 Spoon or pipe swirls of the strawberry Mascarpone generously over the crushed biscuits, or perhaps add a few chopped fresh strawberries to the mixture beforehand. If you’re going to pipe it, forget using a nozzle, just snip the end off a piping bag instead.
 Top with a couple of fresh strawberries, dust with a little icing sugar if you like & serve immediately. I like to slice them 3/4 of the way to the top & leave them attached, then fan them out on these dinky desserts. If you don’t want to use strawberries, try using apricots, raspberries or blueberries, swapping the jam for whichever fruit you use. If you fancy something a bit special, cherries go very well with the delicate almond flavour of crushed Amaretti biscuits – just sprinkle a few toasted almonds on top to decorate before serving. Bellissimo!
 So when you need to whip up a dessert storm, try these swift, sweet solutions for after dinner! Stay hungry 😉 A x
 If you’ve been following my antics on social media, you’ll know I’ve been working on a few (or rather a lot of) floral creations of my own over the last couple of months (which is why my blogs have been a bit all over the place recently, so apologies). Recently, I’ve been making sugar art surprise gifts, including a pair of sparkly snow white
  roses for a wedding present & three beautiful birthday blooms for a lovely friend. Now I’m working on bunches of blossoming roses for Mother’s Day gifts & although my kitchen looks like I’ve opened a sugar florists, I am still managing to bake my usual fayre (although my bread has recently developed a subtle sparkle from the edible glitter, because no matter how much you try to clean that stuff up, it gets everywhere!).
 out & celebrate in elegant, ladylike style. All my friends know that I absolutely love making afternoon tea – dainty, dinky delicacies, miniature gateaux, sumptuous sultanas embedded in fluffy scones, sweet strawberries perched on pastry cups & crustless, slender sandwiches filled with cream cheese & cucumber (not my usual doorsteps of bacon & egg, or meatballs & tomato sauce!). Tea is served in chintzy china cups, with wafer thin lemon slices floating like lilypads on the surface, often accompanied by a glass or two of pink fizz.
 Bake in the centre of the oven for approx. 18 minutes, until slightly risen & little cracks appear on the tops.
 deliciousness, it’s done. Set aside for a couple of minutes to cool slightly.
 Dip the end of a cake stick in some melted chocolate, then gently insert into the base of a cake ball. Gently spoon melted chocolate over the cake ball, removing any excess by lightly tapping the stick (carefully though, you don’t want to lose it!). If you’re making flowers, leave the cake centres to set by standing them in a jar or mug full of dried semolina or rice. If not, cover them with edible glitter, sprinkles, wafer flowers or sugar pearls.
 So that’s your Mum’s elegant afternoon tea sorted, just add a pot of tea & a flute of fizz! Here’s wishing a fabulous Mother’s Day to Mums everywhere (& the Dads who do double-duty as both)! Stay hungry! 😉 Aimee x
 hearts in their hundreds as treats for people to give to their beloved, dipping each one in melted chocolate, decorating them by hand & turning my kitchen into my own little chocolate factory! By the time I’d finished, I really didn’t want to see, smell or taste chocolate for a few weeks after! Last year, my Husband was suitably spoiled as always, with a selection of his favourite handmade chocolates decorating a rather large, milk chocolate frosted heart-shaped chocolate cake (I think there was just enough chocolate in it!).
 This year, I wanted to do something a bit different & as it was birthday
 achievement (they’re quite fiddly & I’m not very patient). I won’t bore you with the details, but as it took me about a couple of hours to create each one from scratch (not including the centres), you can appreciate that I couldn’t watch them being eaten (the Husband kept wandering into another room every time he ate one, so I wouldn’t see).
 Bake them all for about 8-10 minutes, until golden & then gently transfer them to a cooling tray. These will be crisper than the other recipe, so they should be firmer.
 Remember all the little heart centres that you baked? Simply pipe a small splodge of buttercream into them & make little layered lovehearts, for bite-sized treats. You can always drizzle melted chocolate over the top of these if you want to make them extra special.
 Any leftover jam can be put back in the jar & left in the fridge until you need it (don’t throw jam away!). The same goes for the buttercream – just wrap up the end of the piping bag & fold over the snipped end, then keep it in the fridge to use on random cupcakes or chocolate puddings. If you’re really feeling adventurous, tip it into a bowl & add more icing sugar until a bit firmer, then use it to pipe some buttercream roses onto cookies (if you make a mistake, scrape it off, shove it back in the bag & start again – great for teaching kids & keeps them entertained for ages).

 For Christmas, I simply used a tree cutter & drizzled them with melted chocolate (mix a little milk & plain chocolate together for a richer flavour), then simply adorned them with some sugar sprinkles. Why not try making cute reindeer cookies too! Simply use an upside-down gingerbread man cutter to shape your cookie dough & decorate with rolled out fondant or modelling chocolate. They are so easy to make & perfect treats for sharing.


 It’s been a very busy couple of weeks here, so apologies for the delay in writing – we had three birthdays within the first three days of August, plus there are a few more to come & a wedding anniversary at the end of the month. The anticipation of August arriving always hits me as July begins & reminds me of when I was younger – birthday parties being planned by my Mum, all kinds of pastries & party foods being prepared & she would always bake me a lovely birthday cake. One year, she made me a fabulous cake in the shape of a punk rocker’s head, covered in fluffy buttercream & complete with a magnificent multi-coloured mohican hair style! Everyone loved it & we all had different coloured tongues by the end of the party! If only I had a photo of that cake, but it didn’t last very long!
 My Grandma used to make the most amazing velvety rich chocolate cake, which was a well-loved family favourite. It was truly lovely – light, creamy chocolate buttercream would sandwich the fluffy, moist layers of cake together & completely coat the outside in a smooth, simple layer. Grandma would freeze some, so she always had a slice ready for unexpected visitors (you never know when you will need cake!).
 have a play around to find your favourite too – my Husband absolutely loves the coffee & walnut version of this cake. One tip I will share is to go easy on the wet ingredients, as they will affect the moisture of the cake & you might just end up with a soggy mess. Cake is all about balance, so remember that when you are baking & you won’t go far wrong.
 melted, let it cool for a few moments before pouring it into your buttercream (otherwise it will curdle & you will have to start again). Give it a good whisk (get the electric one out for this), until the chocolate is mixed in & then add a tablespoon of milk, just to give it a silky smooth consistency & a nice satin sheen. It should be easy to work with & thick, so you can either pipe it onto your cake or use a pallet knife to spread it onto the layers.
 If you make cupcakes instead of a large cake, these are more portable & you can make all kinds of fabulous treats! Create cupcakes with googly eyes using mini marshmallows & different sizes of chocolate buttons, or make cupcake shoes adorned with pretty pink cookie flowers.
 Even in Summertime, soggy mornings make me think of massive mugs of heavenly hot chocolate, teeming with a mountain of mini marshmallows on a cloud of whipped cream, dusted with chocolate shavings. It’s guaranteed to put a smile on even the sourest of faces, especially if there’s a chunky chocolate chip cookie to dunk in it. I must admit, I like my hot chocolate made the old-fashioned way – boiled milk, slowly poured over flakes of grated chocolate & whisked up until silky smooth with a delicate foamy froth. After one of these & a cookie, I can take on the world (albeit slowly!).
 Over the weekend, I was invited to a beautiful ladies’ afternoon tea at one of my lovely friend’s homes & took some of these naughty chocolate chip delights as a little gift for her (fresh flowers are nice, but you can’t really eat them!). These are based on a blondie recipe & are really rich & indulgent, because they are full to the brim with so much chocolate, then swirled & drizzled with more chocolate (just to make sure there’s enough in them!). The chocolate chip & peanut butter version was a kind of happy mishap – I was experimenting with the recipe & added a splodge of smooth peanut butter into each scoop, encasing that nutty, buttery centre in the cookie dough.
  As they bake in the oven, the peanut butter starts to melt & infuse the cookies (& kitchen) with that nutty flavour & sweet scent. Of course, they are drizzled with melted chocolate too & a few chopped, salted peanuts sprinkled generously on top – the slight saltiness complements the chocolate so well! These are not for the faint-hearted, nor are they for everyday munching really – they should be a treat, or for those days when you’re just feeling a bit pants & want a “pick me up”. If I’m feeling particularly decadent, I’ll make some with plain chocolate chunks & shards of stem ginger (my favourite), or chopped dried apricots with white chocolate pieces. The choices are as endless as your imagination! The best bit? They are really easy & take minutes to make. Hands washed, aprons on & here we go!
 Get yourself a medium sized metal ice-cream scoop (one with a spring loaded handle is best), then scoop dollops of cookie dough up & drop them onto the greaseproof lined baking tray. Leave a good couple of inches between them all – they will grow! If you want to save some for another day, you can always freeze a few scoops at this stage & just defrost them when you fancy a treat.
 Bake in the centre of the oven for between 16-18 minutes, then gently transfer the cookies onto a cooling rack. If you put the tin next to the cooling rack, you can actually pull the greaseproof paper onto the rack & then move the cookies directly onto the rack after. They will be soft until they cool, so be careful as they are more delicate than they look.