

 Sweltering Summer is here & the garden is flourishing fabulously, although the heatwave has played havoc with plans for doing any gardening! The bees have been busy collecting their nectar & blossoms are blooming in abundance, inspiring me to create some Summery sugar art.
As you may have seen on my social media, I love making sugar shoes (usually with some of my handmade sugar paste roses perched prettily on top). They’re definitely not for eating though, as they set like porcelain (plus it takes me at least a couple of days to make everything & I might just cry). Simple  or sassy, shoes are a wonderful way to bring a smile & shouldn’t just be for your feet! Since I began making my fancy footwear, I have tried all kinds of techniques, tools & templates, but always end up using a pair of my favourite shoes as a general guide. If I’m honest, I prefer to make each one “freehand” so I’m creating something unique & special each time.
My first foray into edible footwear was making swirly stiletto cupcakes for a girly afternoon tea party with friends a few years ago. At that point, the only cake decorating I’d done was a few blobs of  buttercream frosting & although they have evolved considerably since then, I still like to make my little cupcake shoes for special occasions. These sumptuously sweet stilettos are really easy to make & baking beginner friendly – the hardest part is deciding how to decorate them. Because I wanted this to be for everyone’s level of ability, I would suggest using ready-made biscuits for the sole & heel in this recipe. Ready to bake it happen? Hands washed, aprons on & here we go!
What you need:
For the Cupcakes (12):
2 large Eggs
4oz Butter (unsalted & room temperature, slightly softened)
3oz Self-Raising Flour
1oz Cocoa Powder
1 teaspoon Instant Coffee (trust me on this, it will make the chocolate flavour more chocolatey)
4oz Sugar (I use my homemade vanilla sugar – pop a vanilla pod in a jar of sugar overnight & that’s it!)
A splash of Semi-Skimmed Milk (about 2 teaspoonsful)
For the Buttercream:
6oz Butter (unsalted, room temperature)
12oz Icing Sugar
Optional:
 A few drops of your favourite food colour (try using the gel colours, as the ones from the supermarket tend to make your mixture go watery & the colours weak – I used PME Cake Decorating natural food colours for this recipe).
(If you’re going to pipe flowers, remember to colour a small amount of the buttercream green for the leaves).
Decorations:
12 Chocolate Finger Biscuits or Ice Cream Cones (for the heels)
12 Plain long flat Biscuits (such as Langue-de-Chat biscuits)
(Tip: have some spares in case of breakages)
Edible Glitter, Pearls, Sugar Strands, Jelly Sweets or Sugar Flowers (you can buy these ready-made in supermarkets)
What to do:
First of all, pre-heat the oven to 190*C. Prepare your tray – get a patty tin & line with a dozen cupcake cases, then set aside while you make the cake mixture.
Put the butter & sugar into a large mixing bowl. Give it all a good whisk with the electric mixer (or a wooden spoon) until it turns a pale golden cream colour.

Add an egg to the mixture, then slowly mix this in to begin with until just combined. Give it a firm whisking until the mixture is smooth. Repeat with the second egg.
Stir the coffee & cocoa powder into the flour, then sift it into the wet mixture. Fold the flour in using a spatula or a metal spoon & making smooth figure of eight movements to incorporate the flour into the wet mixture. A metal spoon will cut any air bubbles, whereas a wooden spoon will knock them out & you’ve just spent ages whisking them in.
Once your mixture is completely smooth, divide as equally as you can into the cupcake cases.
Bake in the centre of the oven for 18-20 minutes, depending on your oven, until they are nicely risen. To check if they are cooked, get a spaghetti stem & poke it in the middle – if it comes out clean, they’re done.
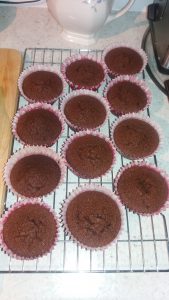 Remove your cupcakes from the tray & pop them onto a cooling rack. Leave until fully cooled.
Now you’re ready to start decorating & will need your buttercream. Put the butter in a bowl & beat until smooth, then spread it around the base of your bowl (so the sugar will stick to it).
Carefully, without causing a dust cloud, tip all the icing sugar on top of the butter.
Get a spatula & press the sugar into the butter, scooping it in from the sides of the bowl, flipping it over & repeating. It will only take you a few moments & your arm might ache a bit, but it will create a smooth buttercream without the puff of sugar an electric mixer would give you!
Once combined, you’re ready to start getting creative with your cupcakes! If you’re colouring your buttercream, add a couple of drops of colour & whisk into the mixture , adding a little more until you get the colour you like (please read the instructions on the bottle). Usually, I only add about 4 drops as these gel colours are quite true to colour & don’t require much.
 Once you’re happy with your buttercream, pop in a piping bag with your preferred nozzle & get swirling! For a large swirl covering the whole cake, start at the outer edge & pipe slowly around your cupcake, heading towards the centre & finish with a swirl in the middle. If you’re not sure how, my tip is to practise on a piece of greaseproof paper a few times beforehand. You can always scoop the buttercream back into the piping bag when you’re ready (no point in wasting all that hard work you’ve put in!).
 Put the cupcakes on the serving plate or board that you will be using to present them (once they’re made, you want to be able to move them easily). Leave a couple of inches space between them.
Push a biscuit into the buttercream roughly at a 45 degree angle & put your “heel” under the free end of the biscuit. Use a splodge of buttercream to hold it in place & pipe a swirl or two to make it look pretty.

Time to add some sparkle! Decorate the buttercream on your cupcake “toes” with a sprinkle of edible glitter, pearls, sugar strands, jelly sweets or sugar flowers – it’s your creation, so make it how you like! Use long multi-coloured sugar laces to create bows or straps on your heels too – try plaiting a few together to make a thicker shoe strap. Because I had some sugar paste leftover, I made a few roses & leaves for the ones pictured.
That’s it! Your sparkly shoes are ready to serve! These are perfect for all kinds of celebrations – afternoon tea, birthdays, Princess parties, wedding or baby showers. Because they’re so easy to make, these are brilliant for any budding bakers who want to get creative. They also make the perfect gifts too.
 Next time you’re having a few friends over for a special occasion, why not kick it off with some handmade sweet shoe treats & make my Cupcake Chocolat-toes! Stay hungry! A 😉 x

 Spring has arrived. It’s like we’ve just opened a window after Winter, a breathe of beautiful freshness after the cold snap. This time of year is the most exciting for me, when the sleepy seeds & bulbs are stirring in the ground, springing from the soil & bringing a new season of flowers, vegetables & recipes! There are always lovely smiling faces at my local shops too & although I only popped in for eggs, I always end up with a basket full of goodies
  (including a potted Oregano to add to my ever increasing hoard of herbs on the patio, but not the walnuts that I only remembered as I pulled into the driveway). Whilst waiting at the checkout, I got chatting with one of our Derbyshire Fire & Rescue Fire Fighters (hi Anna!). It never ceases to amaze me how our Fire Fighters head off into potentially highly dangerous situations (obviously they have lots of training & nerves of steel), so huge thanks & appreciation for their service!
 been making for many years. When I worked in an office, I would bake cakes for client meetings & once made this for an important new client – I shelled the walnuts myself & a piece accidentally got in the cake, which obviously ended up in her slice! This recipe began as a few scribbles in the back of a notebook one afternoon, when I decided to bake & discovered a lack of sugar, so used golden syrup instead (one of my best experiments!). Before we get started, I just want to address the type of sugar for this particular recipe. Because golden caster sugar is not always easy to find, I tend to use light golden Demerara or Vanilla sugar (just put regular sugar in a jar with a snapped vanilla pod overnight). It blends perfectly without any grittiness, but if you’re concerned just chuck it into a coffee grinder to make it fine. Ready to get baking? Hands washed & aprons on, here we go!
 6oz Unsalted Butter (room temperature)
 Once all your eggs are combined, sift in the flour & then fold into the mixture. Folding is just stirring in a figure of eight style around the bowl, until your dry ingredients are mixed into the wet.
 Slide a pallet knife around the edge of the cake to loosen it from the tin, then tip it onto your (oven gloved) hand, peel off the greaseproof paper from the base (pull it back onto itself, not straight up or you’ll break your cake) & place the cake carefully onto the cooling rack, bottom side down. Repeat with the other one & leave to go completely cold.
 Carefully place the top layer of cake onto the buttercream, pressing gently down & making sure it’s even all the way around.
 Leave to set for ……. as if I’d make you wait! Get slicing & sharing your beautiful baking! If you do have any leftovers, wrap in cling film & freeze for an afternoon treat. Whether you’re celebrating or just fancy a slice of sweetness, why not “Espresso yourself” & whip up my Coffee & Walnut cake to share! Stay hungry! Aimee 😉 x
 It’s been a very busy couple of weeks here, so apologies for the delay in writing – we had three birthdays within the first three days of August, plus there are a few more to come & a wedding anniversary at the end of the month. The anticipation of August arriving always hits me as July begins & reminds me of when I was younger – birthday parties being planned by my Mum, all kinds of pastries & party foods being prepared & she would always bake me a lovely birthday cake. One year, she made me a fabulous cake in the shape of a punk rocker’s head, covered in fluffy buttercream & complete with a magnificent multi-coloured mohican hair style! Everyone loved it & we all had different coloured tongues by the end of the party! If only I had a photo of that cake, but it didn’t last very long!
 My Grandma used to make the most amazing velvety rich chocolate cake, which was a well-loved family favourite. It was truly lovely – light, creamy chocolate buttercream would sandwich the fluffy, moist layers of cake together & completely coat the outside in a smooth, simple layer. Grandma would freeze some, so she always had a slice ready for unexpected visitors (you never know when you will need cake!).
 have a play around to find your favourite too – my Husband absolutely loves the coffee & walnut version of this cake. One tip I will share is to go easy on the wet ingredients, as they will affect the moisture of the cake & you might just end up with a soggy mess. Cake is all about balance, so remember that when you are baking & you won’t go far wrong.
 melted, let it cool for a few moments before pouring it into your buttercream (otherwise it will curdle & you will have to start again). Give it a good whisk (get the electric one out for this), until the chocolate is mixed in & then add a tablespoon of milk, just to give it a silky smooth consistency & a nice satin sheen. It should be easy to work with & thick, so you can either pipe it onto your cake or use a pallet knife to spread it onto the layers.
 If you make cupcakes instead of a large cake, these are more portable & you can make all kinds of fabulous treats! Create cupcakes with googly eyes using mini marshmallows & different sizes of chocolate buttons, or make cupcake shoes adorned with pretty pink cookie flowers.